
If you're facing issues like websites not loading, slow internet performance, or outdated DNS records, it's time to flush your DNS cache. Clearing the DNS cache helps your operating system retrieve updated DNS information, improving connectivity and resolving browsing problems. In this guide, you'll learn how to flush DNS on Windows and Mac in just a few simple steps.
The DNS cache (Domain Name System cache) is a temporary database maintained by your computer's operating system. It stores the IP addresses of web servers you’ve recently visited. While it speeds up access to websites, it can sometimes become outdated or corrupted, causing internet issues.
Here are some common reasons to clear your DNS cache:
• Websites not loading or showing outdated content
• Security and privacy concerns
• Switching DNS servers (e.g., to Google DNS or Cloudflare)
• Troubleshooting network errors
Flush DNS on Windows 10 and Windows 11
1. Press Windows Key + S and type Command Prompt.
2. Right-click on Command Prompt and select Run as administrator.
3. In the Command Prompt window, type the following command: ipconfig /flushdns
4. Press Enter.
!Image description
You’ll see a confirmation message:
“Successfully flushed the DNS Resolver Cache.”
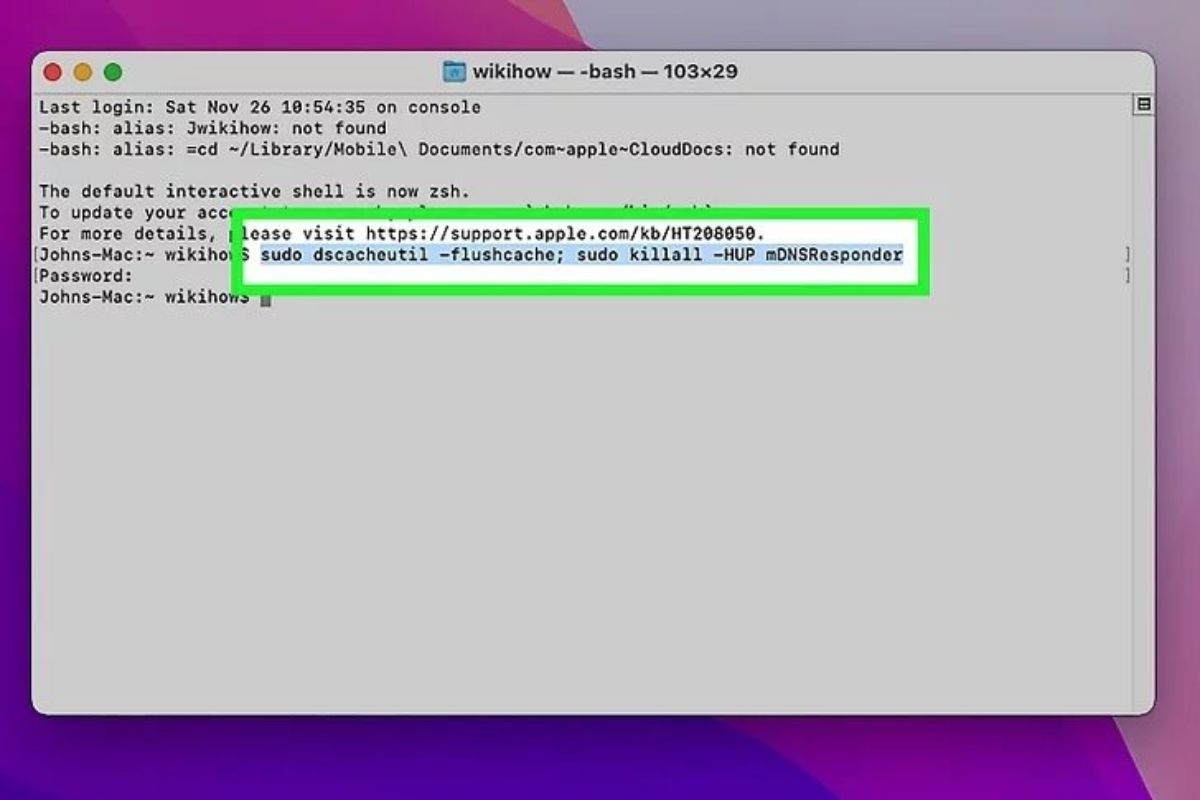
Flush DNS on macOS Ventura and Monterey:
1. Open Terminal (Press Command + Space, type "Terminal", and hit Enter).
2. Paste the following command: sudo dscacheutil -flushcache; sudo killall -HUP mDNSResponder
3. Press Enter.
4. Enter your admin password when prompted.
!Image description
There is no success message, but the DNS cache will be cleared.
Flush DNS on macOS Big Sur, Catalina, Mojave
Use the same Terminal command as above:
sudo dscacheutil -flushcache; sudo killall -HUP mDNSResponder
Flush DNS on Older macOS Versions (Yosemite and earlier)
For Yosemite, use this command:
sudo discoveryutil mdnsflushcache
While most systems don't provide a visible confirmation (especially on Mac), you can test if the flush worked by:
• Visiting a previously unreachable website
• Using ping or nslookup to check DNS resolution
• Restarting your browser or device for best results
Clearing your DNS cache is a simple but powerful way to troubleshoot and speed up your internet experience. Whether you’re on Windows or Mac, knowing how to flush your DNS ensures you always access the most current version of any website.
What Is DNS Cache?
The DNS cache (Domain Name System cache) is a temporary database maintained by your computer's operating system. It stores the IP addresses of web servers you’ve recently visited. While it speeds up access to websites, it can sometimes become outdated or corrupted, causing internet issues.
Why Should You Flush DNS Cache?
Here are some common reasons to clear your DNS cache:
• Websites not loading or showing outdated content
• Security and privacy concerns
• Switching DNS servers (e.g., to Google DNS or Cloudflare)
• Troubleshooting network errors
How to Flush DNS in Windows
Flush DNS on Windows 10 and Windows 11
1. Press Windows Key + S and type Command Prompt.
2. Right-click on Command Prompt and select Run as administrator.
3. In the Command Prompt window, type the following command: ipconfig /flushdns
4. Press Enter.
!Image description
You’ll see a confirmation message:
“Successfully flushed the DNS Resolver Cache.”
How to Flush DNS in macOS
Flush DNS on macOS Ventura and Monterey:
1. Open Terminal (Press Command + Space, type "Terminal", and hit Enter).
2. Paste the following command: sudo dscacheutil -flushcache; sudo killall -HUP mDNSResponder
3. Press Enter.
4. Enter your admin password when prompted.
!Image description
There is no success message, but the DNS cache will be cleared.
Flush DNS on macOS Big Sur, Catalina, Mojave
Use the same Terminal command as above:
sudo dscacheutil -flushcache; sudo killall -HUP mDNSResponder
Flush DNS on Older macOS Versions (Yosemite and earlier)
For Yosemite, use this command:
sudo discoveryutil mdnsflushcache
How to Check If DNS Was Flushed Successfully
While most systems don't provide a visible confirmation (especially on Mac), you can test if the flush worked by:
• Visiting a previously unreachable website
• Using ping or nslookup to check DNS resolution
• Restarting your browser or device for best results
Final Thoughts
Clearing your DNS cache is a simple but powerful way to troubleshoot and speed up your internet experience. Whether you’re on Windows or Mac, knowing how to flush your DNS ensures you always access the most current version of any website.